WARNING!!
IMPORTANT!
-We will not responsible for any damage.-Do it at your own risk!
-Read carefully, and don't skip any part.
-Make sure the downloaded Firmware / Kernel is only for Samsung Galaxy S II - i9100G!
Instructions
Step 1: Download these file.
- Odin
- Samsung USB Driver
- List of Custom Kernel (Optional)
- List of Firmware (Stock ICS ONLY!) (Optional)
Step 1: Enable USB Debugging.
- If you are on ICS, go to Setting > Developer Option > USB Debugging
- If you are on Gingerbread, go to Setting > Development > USB Debugging
Step 2: Entering Download Mode / Odin Mode.
- Turn Off your phone.
- Enter Download mode. (To do so, press and hold the Volume Down + Home + Off / On buttons while powering on the phone. When the screen turns on, let go of all three buttons. You'll see something like below)
- Don't worry about the warning. Now press Volume Up to proceed.
- Congratulations! Now you are in Download Mode/Odin Mode.
- On your PC, open Odin, and then connect your phone to PC via USB cable.
Step 3: Handling Odin
 |
| Click picture to Zoom. |
- Now, make sure your Odin show up the same thing like picture above. Don't touch other than that!
- Make sure your phone has been successfully detected by Odin (As shown in the yellow box-there is a blue-wish color appeared). If not, please close Samsung Kies that works in background mode. You can check it at system tray/task bar.
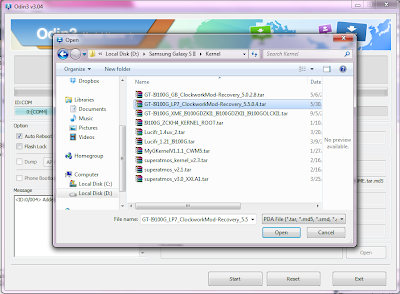
- Now, at PDA, locate the Downloaded Kernel/Firmware.
- After that, click Start, and the process may begin and takes about a few minutes to finish.
- Your phone will reboot, and taking a few minutes to re-constructing its firmware.
Voila!..Its Done.
*If your device went wrong after flashing custom kernel/Rom (in other words = Soft Brick), please follow the instruction given HERE
*If your device went wrong after flashing custom kernel/Rom (in other words = Soft Brick), please follow the instruction given HERE


No comments:
Post a Comment